2

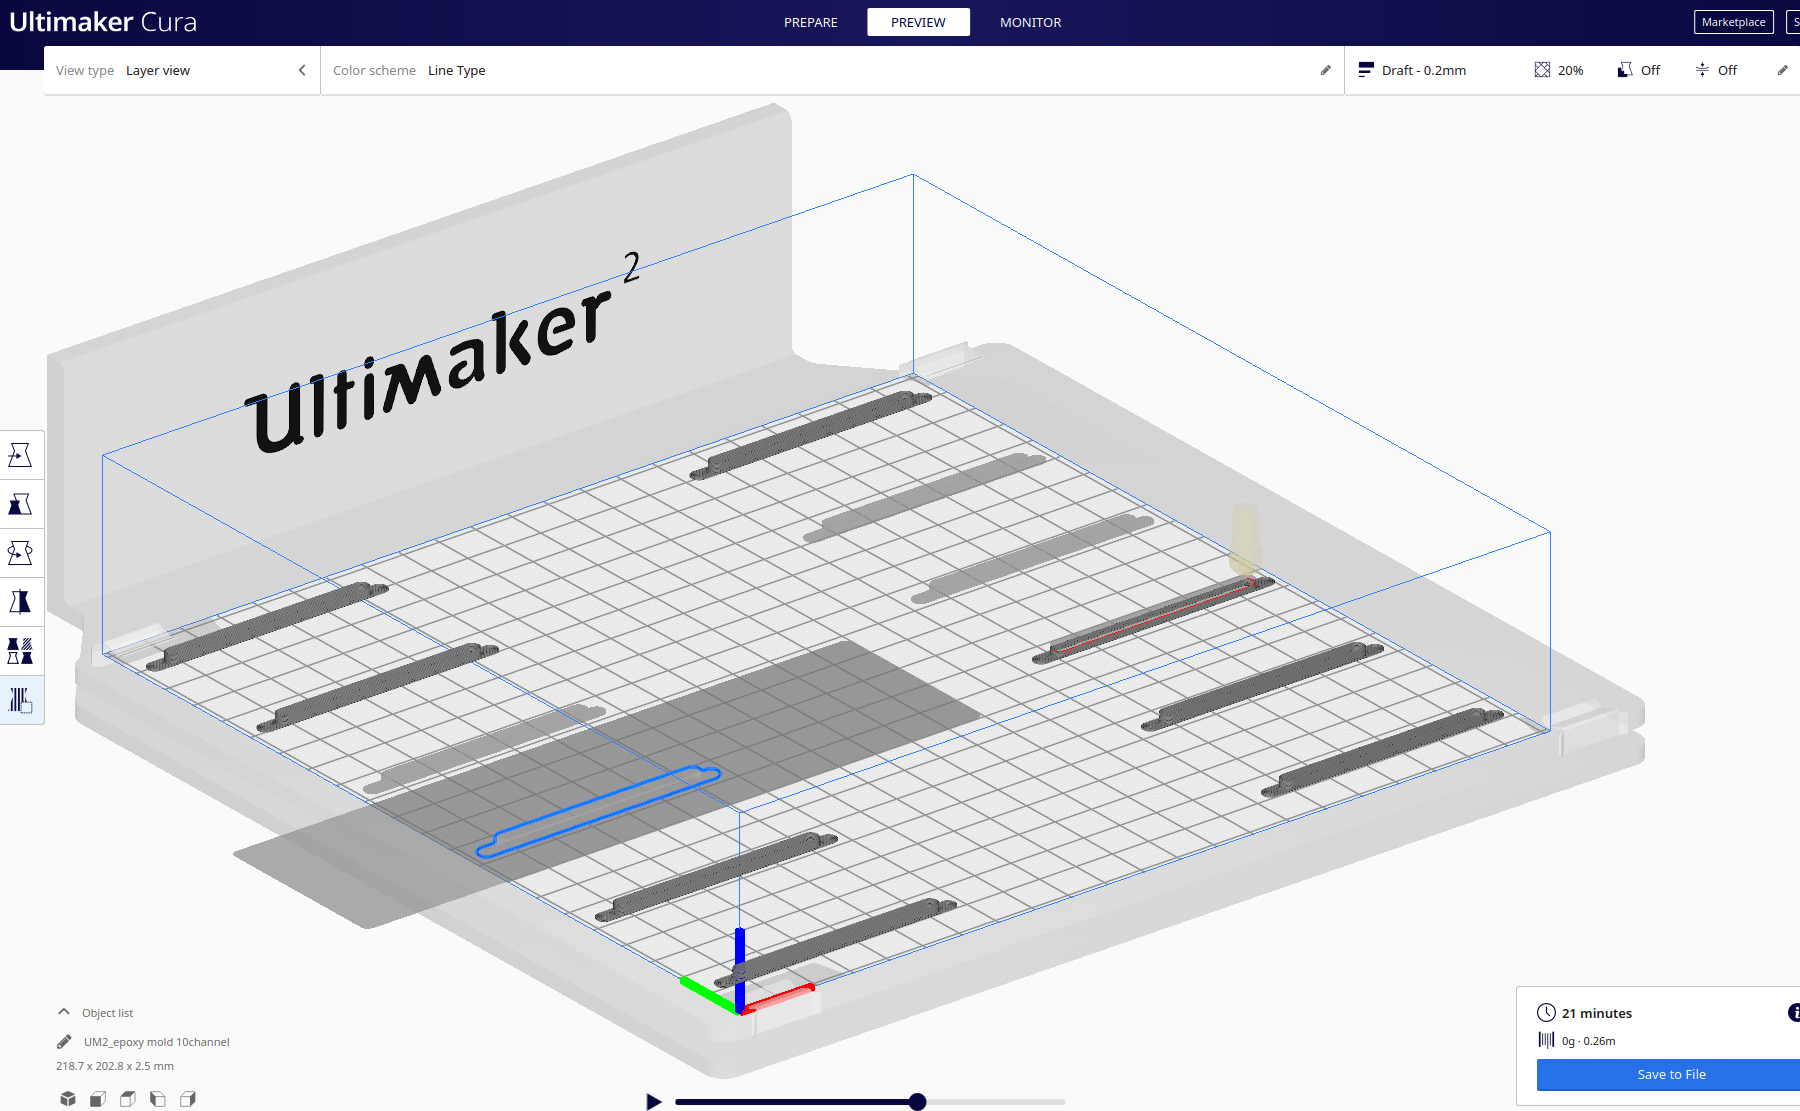
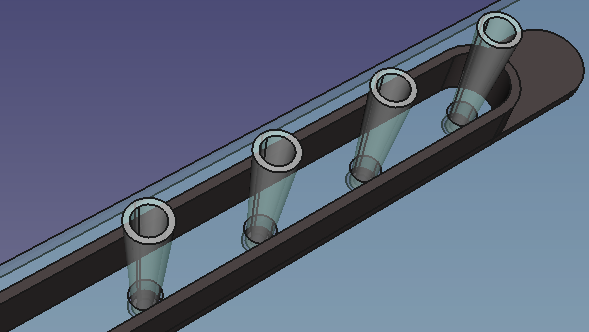
I would like to 3D print a small thin tub/mold for an epoxy resin. I have tubings inserted into holes, and I need to fix these tubings securely with epoxy (see picture below). The space is very limited, and the whole assembly must have a smallest possible footprint, so I have to confine the epoxy from spreading to the sides - that's why I need a tub. The tub itself must have as thin walls as possibly for the same reason.

CAD model

The wall thickness is constant, so theoretically the nozzle could just make one single loop to print a layer, and then move to the next one. Kinda a spiral motion. It seems to be so simple! How do I get the slicer (I use Ultimaker 2 with 0.4 mm nozzle, CoPA material, and slice in Cura 4.6.1) to produce single outline walls?

I tried so many things, but I couldn't get this.

With the default settings for 0.2 mm layer a 0.4 mm wall (or thinner) will not be printed at all (left - 0.35 mm wall, middle - 0.4 mm, right - 0.45 mm): Default settings

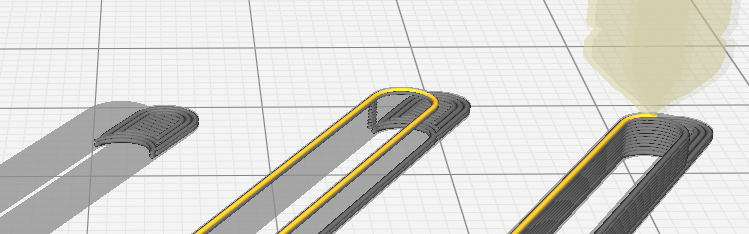
Occasionally even the 0.45 mm-thick wall gets excluded from the print, which is really bizarre: absent walls

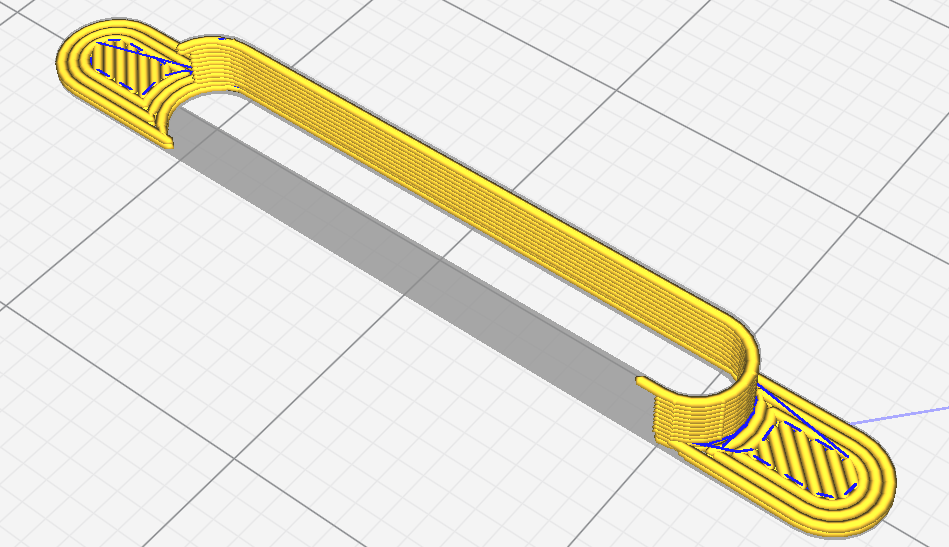
If I make the wall thicker, then the slicer tries to pack two discontinued lines next to each other, which is even worse. Cura has an option 'print thin walls', but this results in jerky, discontinued tracks. discontinued tracks

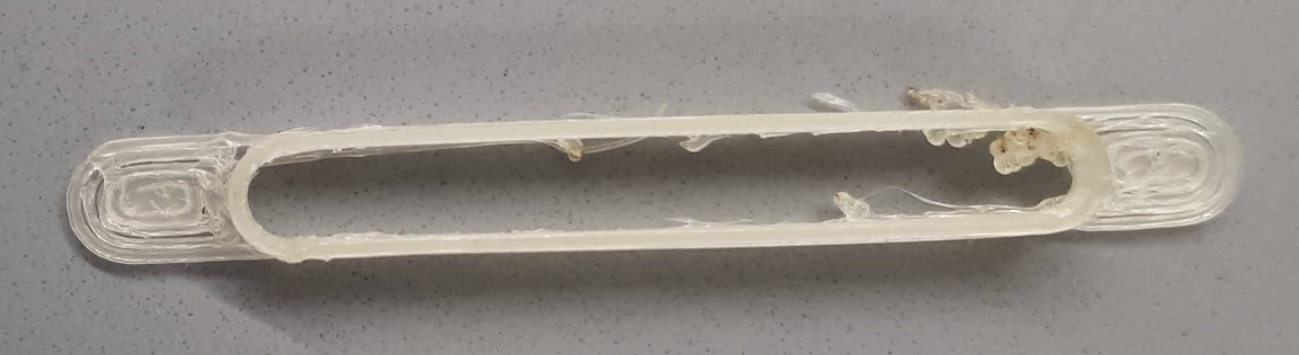
At the moment I print 0.45 mm walls with the 'print thin walls' option turned on, this is the closest to what I need that I could find so far.

additional nozzle movements

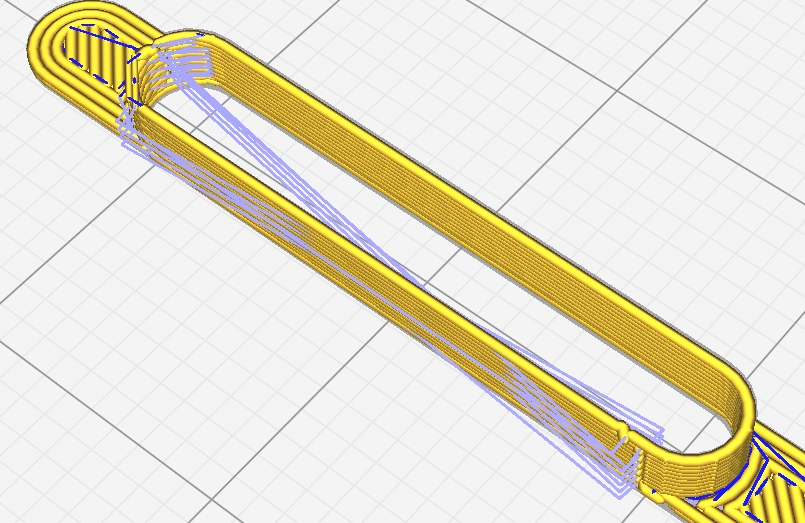
This may look fine in Cura, but the result is pretty ugly due to the additional nozzle movements... I really don't understand why the printer has to do them. It prints the outline, then jumps to the 'corner' and deposits a blob there. I can carefully remove these blobs with a scalpel, but come on, this is a disposable part and I need a ton of these!!!

printing results with blobs

If that helps, here is a link to a sample STL file with 450 μm walls.

Roman Kiselev
  • 121
  • 1
  • 5

4 Answers4

3

Cura is exceptionally bad at printing details comparable in size to the configured line width. Lower your wall line width to something like half the wall thickness (i.e. 0.225 mm) and see if that works. With a standard 0.4 mm nozzle I've had success printing tiny details with 0.2 mm line width or smaller. For example:

tiny printed icosahedron bead with thread hole on penny

And here's your model printed at 0.225 mm line width:

print of OP's model

I also had to slow down the print speed considerably to get first layer adhesion with such thin lines. I did 40% via the printer UI, relative to 30 mm/s base rate, so effectively 12 mm/s. After first layer increasing speed was no problem.

Important: You also need to set the "Outer Wall Inset" (wall_0_inset) setting to 0. This is a broken Cura feature that's supposed to compensate for wall line widths less than the nozzle width, but the math is incorrect and not actually needed, and if it's left at the default it will reproduce exactly the same "missing wall" issue you got with full wall line width.

1

You don't need to use vase mode. But vase mode will work.

I'm not familiar with Cura, I use PrusaSlicer, but I'm sure there are equivalent settings.

What you want to do is model the part in two pieces. The first piece will be the same height as the base. The second piece will be the top half. It can all be one model, but it helps to think of it as two.

In the bottom part, add your hole, and print it with however many solid layers as is required to make the base thickness.

For the top part, make it solid, and print it with 1 perimeter and 0 % infill and 0 top and bottom layers. You can decide the wall thickness by tweaking the extrusion width.

If you want to make the part perfect, you can size the bottom hole by taking the dimensions of the upper portion and subtracting whatever extrusion width you will use from the surfaces.

You can print as many of these as you want as close together as you can because it isn't using vase mode.

0scar
  • 37,708
  • 12
  • 68
  • 156
TheRooster
  • 43
  • 6
0

After a lot of experimenting and trying several different things I finally discovered the 'vase mode'. In this mode the 3D printer makes a hollow object with a single-layer outer shell.

The corresponding setting is called 'spiralize outer contour' in Cura 4.6.1. In this mode the printer does not make distinct layers and prints the whole shell in one continuous motion (video), exactly as I need it. The print is done faster, and the quality is dramatically better!

improved print

The downside is that only one model can be built in this mode. If you place several models on the build plate, they will get connected by a wall. However, there is a workaround in Cura: under 'Special modes' set 'Print sequence' to 'One at a time'. Ultimaker will print several model one after another provided they are not tall and you leave enough space between them (dark area in the picture below). I could print up to 12 models at once, which is enough for me.

enter image description here

Roman Kiselev
  • 121
  • 1
  • 5
0

I recently wanted to print something with small walls as well and this site helped me out. Basically just set horizontal expansion to 0.04 and Cura does a better job.